This isn’t just a UI facelift. It’s an aggressive play to dominate the “prosumer” video market by making sophisticated generative tools—stuff that used to require a powerhouse GPU—accessible to anyone with a Chrome login and a decent prompt.
| Attribute | Details |
| :— | :— |
| Difficulty | Intermediate (Requires prompt engineering skills) |
| Time Required | 2–5 Minutes per generation |
| Tools Needed | DreamVid Web, Midjourney (for base images), ElevenLabs (for audio sync) |
The Why: Moving Beyond the “AI Jitter”
Most AI video generators suffer from a distinct “hallucination” problem: limbs morphing into chairs, backgrounds shifting like liquid, and characters that look like they crawled out of the uncanny valley. Up until now, creating a consistent 10-second clip was a matter of sheer luck. As AI’s rapid advancements challenge human relevance, tools like DreamVid are being forced to evolve from novelty toys into precision instruments.
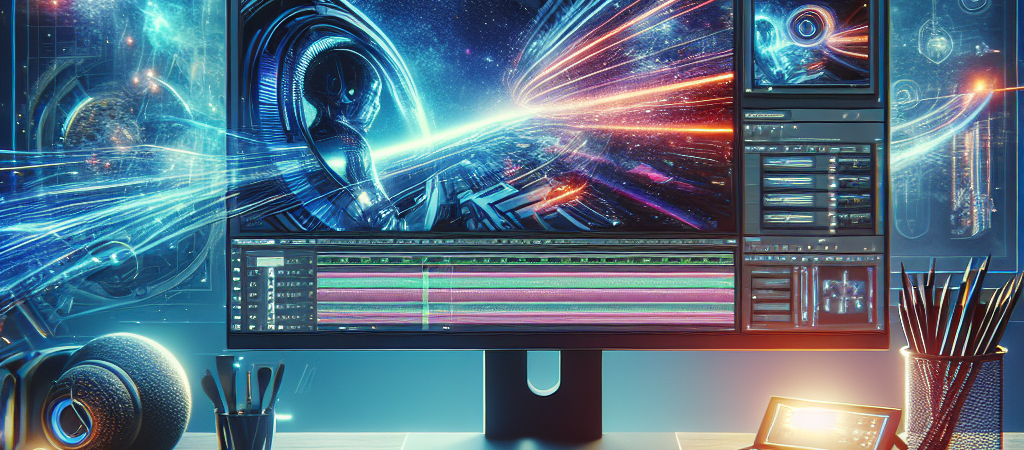
DreamVid’s new web version targets the friction points that stall creative workflows. By moving away from clunky Discord bots or lightweight mobile apps to a dedicated web environment, they’ve introduced more granular controls over motion, framing, and style consistency. For small business owners, social media managers, and indie filmmakers, this solves the “time-to-pixel” problem. You no longer need to spend four hours masking an object manually when the AI can track the motion path for you in seconds.
Step-by-Step: Mastering the New DreamVid Interface
The new interface is clean, but don’t let that fool you. If you want to move beyond generic “cinematic” pans, you need to follow a structured workflow. However, it is essential to remember what happens when people don’t understand how AI works—the goal of this workflow is to bridge that knowledge gap.
- Configure Your Canvas: Start by selecting your aspect ratio. Use 9:16 for TikTok/Reels or 16:9 for YouTube. The new web version allows for higher resolution exports right out of the gate, so ensure you toggle the “High Definition” setting before you hit generate.
- Upload a Reference Image: While text-to-video is impressive, Image-to-Video (I2V) is where DreamVid shines. Upload a high-quality character or landscape asset. This anchors the AI and prevents the visual style from drifting.
- Define the Motion Vector: Use the new motion slider to dictate the intensity. A value of 3-4 is perfect for subtle hair movement or leaves blowing; anything above 8 risks the AI breaking the laws of physics.
- Prompt with Specificity: Instead of “a car driving,” use “Low-angle tracking shot of a matte-black muscle car speeding through a rain-slicked Tokyo street, neon reflections on the hood, 35mm film grain.”
- Iterate and Extend: Don’t settle for the first four-second clip. Use the “Extend” feature to build out a sequence, maintaining the character’s likeness across multiple shots.
💡 Pro-Tip: To get the most “cinematic” look, use the negative prompt box to exclude “cartoon, 3D render, low resolution, and plastic skin.” If you want to save your credits (and your sanity), generate your base images in Midjourney first and use DreamVid solely for the animation phase. Note that the industry is changing rapidly, as seen with Disney and Universal suing Midjourney over copyright claims, so always ensure your base assets are compliant with your needs.
The Buyer’s Perspective: Is It a Runway Killer?
If you’ve used Runway Gen-2 or Pika Labs, DreamVid’s new web version will feel familiar but notably more streamlined. Runway remains the “Photoshop” of AI video—deeply technical, massive feature set, but a steep learning curve. Pika is the “Canva”—fun, quick, but sometimes lacks the professional polish required for commercial work.
DreamVid sits comfortably in the middle. Its strength lies in its temporal consistency. It is remarkably good at keeping a face looking like the same person from start to finish. However, it still lacks some of the advanced “Motion Brush” features found in competitors, which allow you to paint specific areas of an image to animate.
For the price point, DreamVid offers a higher volume of generations per dollar than many of the legacy players. If your workflow involves churning out dozens of high-quality social clips a week, the cost-to-output ratio here is hard to beat. Investors are keeping a close eye on these types of generative advancements, often debating which no-brainer AI stocks to invest in for maximum growth as the market matures.
FAQ
Does DreamVid AI offer a free tier?
Yes, new users can access a limited number of “credits” to test the web interface, but professional-grade, watermark-free exports require a paid subscription.
Can I use the generated videos for commercial projects?
If you are on a paid plan, you own the rights to the output. However, always check the specific terms of service regarding the use of “Image-to-Video” if the original image wasn’t yours.
How does it handle human faces?
Surprisingly well. The updated web version has an “Enhanced Face” toggle that significantly reduces the blurring and distortion common in older generative models.
How do I manage my privacy if I want to opt out of AI training?
While DreamVid has its own privacy settings, users concerned about broader data usage across the web might be interested to know that Firefox just built an “Off” switch for the AI era through a new toggle.
Ethical Note/Limitation: While DreamVid is a leap forward, it still cannot perfectly replicate complex human hand movements or accurately render specific, legible text within a moving scene.